Take Better Vacation Photos With Your Smartphone
You Can Take Better Vacation Photos With Your Smartphone
Thank you for listening to The Orlando Local Show, Episode 3. We packed this episode with advice for taking better vacation photos with your smart phone.
Starting with better composition, we discuss how to frame your photos to get better results than the typical snapshot. Next, we discuss how to make the most out of your lighting and avoid some common problems.
Following those elements of capturing your photo, we discuss some post processing techniques and apps to help you fine tune your photos to achieve spectacular results.
Related Links
We discussed these products and apps to help you take better vacation photos on the show. Here are a few links for your convenience to find them on Amazon.com or the iTunes Store.
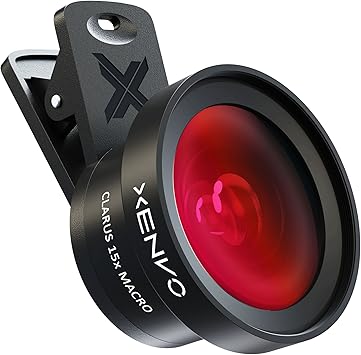
The Xenvo Pro Lens Kit is the perfect accessory for your smartphone, tablet, or laptop. It is backed by a lifetime warranty so you can be sure of its quality.
This universal lens has high-quality lenses to avoid vignetting and flare. It comes with a rechargeable LED light to help in low-light situations. Made from aircraft-grade aluminum, it's built to last. The soft rubber pads won't scratch your device. Includes a carry case.
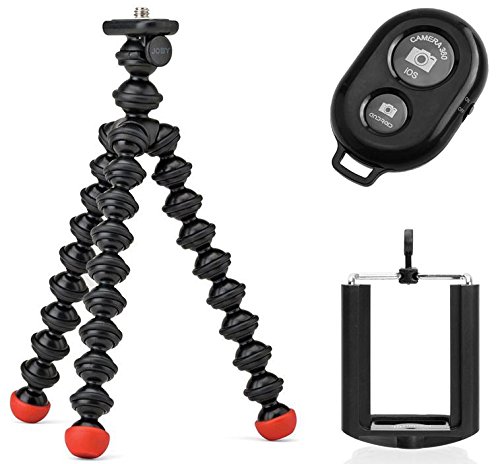
Looking for a light, compact tripod that can go anywhere with you? Check out the Joby GorillaPod Magnetic Tripod. This flexible little tripod has super strong magnetic feet that allow you to attach it to anything metal so that you can capture better perspectives with its flexible wrappable joints.
The Bluetooth wireless remote is ideal for taking selfies, group photos & wide angle views and has a range of up to 30 ft. Perfect for throwing in your bag, backpack, or pocket. This versatile tripod is a must-have for anyone who likes to travel light.

If you're looking for a waterproof phone case that will keep your device safe and dry, no matter the conditions, then you need the JOTO Waterproof Phone Case. This case is IPX8 certified and waterproof to 100 feet, so you can rest assured that your phone will be protected from water or dirt.
The case features a transparent design on both sides, so you can still use all the features of your phone, including the touchscreen. And with its no-border design, you'll have easy access to all your phone's side buttons.
Fotor Photo Editor & Camera Plus
Get Free Updates of The Orlando Local Show

The Orlando Local Show podcast library is here for you to search and listen to helpful episodes about Orlando.
Transcript
William: Welcome to the Orlando Local show, episode number three.
Thank you very much for joining us on the Orlando Local Show. Today we’re going to be talking about taking great photos with your smart phone. Come back home with some great memories of your Walt Disney World vacation. Take it around the rest of Orlando for all we care.
Thank you very much for joining us. We really appreciate you. My name is William Beem.
Lee: Hi, I’m Lee Beem.
William: And we just wanted to go over a little bit of helping you take better photos with your smart phone. And that doesn’t mean that you can’t bring a DSLR or a point and shoot or something else like that, but there are times that you just really don’t want to lug that stuff around.
We are both into photography; we enjoy it. I’ve got another site, williambeem.com that’s actually my photography blog. We have a lot of fun taking photos, but there are a lot of times that you just don’t want to be messing around with a big, heavy camera.
Lee: That’s right. I mean, it’s a vacation. You want to spend time with your family or your friends and just enjoy yourself and there are times to take photos and get seriously into it, but this is not a photography thing. This is for real people who want to capture memories. So nobody is going to critique your photos. This is just some tips and hints to help you get the best out of yours so you can be happy with the memories you capture and share some stuff you can be proud of, with your friends and family.
William: And don’t think that just because you’ve got a smart phone, particularly let’s say you’re a photographer and you’ve got a nice DSLR – I know, we both do and we love our photos that we get from that – but that doesn’t mean that we can’t get good quality photos from a decent smart phone. And there are actually a lot of advantages to taking a smart phone over a DSLR, not the least of which is it’s easy to carry with you. You don’t have to lug something big and heavy.
Lee: That’s absolutely true. It’s quite liberating, actually, when you’re used to carrying the big camera bag, because I did it for years. Every day, in and out of the parks and then I think it was Independence Day 2014, I just decided I’m not messing with a big camera bag and I just took my smart phone. Oh wow!
William: It really does change your experience and the other thing is you don’t stick out like a sore thumb. Almost everybody else is out there taking pictures with their smart phone and you don’t look like you’re just standing out with the big camera, waiting for everybody else to get out of the way, which is never going to happen at a tourist park. You’re going to have people in your photos so just kind of embrace that already.
But it’s lightweight, it’s convenient and it’s also online. As soon as you take a shot you don’t have to wait to go back to your room, load it on your computer, or even worse if you didn’t bring a laptop, to go back home. You can just go ahead and edit it right there on your phone, maybe while you’re having a meal or sitting down taking a break, and then share it online at the moment from where you are. That’s good if you want to have the geo tagging and check in or also if you just want to keep your family and friends a little jealous of the fact that you’re in a park and having fun there.
Lee: Oh, that’s wonderful. That’s a great thing to use. Here I am now, while everybody else is at work. Check the view from my office!
I tell you what else is nice about the instant sharing ability with taking photos on your smart phone, and I did that on our last full-on vacation to Walt Disney World – I actually used social media as an online journal. You’ve got a time and date stamp, you can put your captions on there, you get people’s comments on there and it’s actually quite an interesting little journal. Sometimes I just like to go back and do a search on Facebook and get back into that month and read over those few weeks where we were there. I know, we used to do long vacations! It’s just a nice little way to document it. I’m a scrapbook and journal person so I always enjoyed that, but this was my first time doing it with social media. It’s great, but you couldn’t do that instantly with any kind of camera where you have to transfer things from a memory card.
William: No, you really can’t. And obviously most of the smart phones are also going to have built in video so if you’re there and you want to do video as well as your snapshots. One of the things I found just last weekend. We were taking some photos at a restaurant and I didn’t actually put all the photos on Facebook, but Facebook read my photos and said “We built a little video for you of all of your photos” and you can style it to music and a theme. It actually turned out pretty nice.
It was nice. I was surprised. I didn’t even know they had anything like that. They didn’t give it to me.
Lee: No. I took photos as well at the restaurant, but maybe yours were better.
William: I guess I must be special. I got Facebook features before you did.
Lee: You did!
William: It was a nice thing. We went to a restaurant, I took some snapshots of the exterior, the interior; I took some photos of the food and put it together and Facebook organized it into a really nice little maybe 30 second or one minute video of my photos of the day.
Lee: Yeah.
William: It had music to it and it had a theme. You could change the music depending on the mood that you’re in and that’s a nice little thing that you’re going to get on your smart phone if you’ve got a Facebook account, that you’re not going to get from any of your other cameras.
Lee: That’s true. And I mean, if you’re really picky about how you put it together, there are apps that you can install, I think, that would be able to do that.
The other thing about a smart phone – I was just having a look at some of my photos from one of our first Disney vacations and I had a point and shoot at the time - really, the iPhone photos I’m getting (and I’ve just got the 5S so I’m not even into the newest one) but the photos that I’m getting with the iPhone now are probably comparable in quality to the ones that I was taking with a camera that cost me a few hundred bucks in 2008.
William: They really are. I’ve got the iPhone 6S Plus, so it’s the big old phablet, and it’s got an even better camera inside of that. I think it has a 12 megapixel camera so the size and resolution you are getting is as good as my old D700.
Lee: Yeah, which is pretty good.
William: And it’s got really nice clarity and contrast and then you can just kind of enhance that further with some of the apps that are available out there. I’m not going to give up my DSLR by any means, but if we’re going to be moving around or we’re going to be on the go, I’m quite happy for the most part with just taking my iPhone.
Lee: I think cameras on phones, even if you are using an Android or some other kind of smart phone, have all really upped the standards of the cameras.
I know not too many years ago I remember I was into my photography then already and I would see people walking around parks and taking their family snapshots with a phone and at the time I’d think to myself, yeah!
William: Right!
Lee: But now, there is nothing wrong with it. I mean, they have really upgraded these things nicely.
William: Well, I can’t remember which one – whether it’s a Windows phone or an Android – it’s definitely not one of the iPhones, but it’s already up to 50 megapixel photos. I mean, that’s more than my Nikon D800 as well. That’s a 36 megapixel and if you’ve got a 50 megapixel camera and something that fits in your back pocket, that’s just a tremendous amount of resolution.
Lee: I tell you why it’s not an iPhone. You need expandable memory to store those things.
William: That’s true!
Alright, so you’re going to be going out there, what do you need? Obviously we are talking about taking a smart phone. It doesn’t have to be an iPhone. I mean if you’re an Android user, a Windows phone user or even a Blackberry with a camera, so long as you’ve got something and you’ve got reasonable quality with your photos, you can take better photos.
Lee: You absolutely can.
William: There are a couple of things that we want to recommend that you want to bring with you thought to help you get there. One of them is for stability and the other one is kind of for reach.
For stability there are times where, maybe if you want to shoot fireworks, you’re going to need something stable to hold that phone. You can’t just necessarily hand hold fireworks and get good shots.
Lee: No, because you need the little shutter to be a bit slower.
William: Yeah, and that is also going to take some apps. Not every camera app on the iPhone or some of the other phones is going to let you adjust your shutter speed. One of the things you need to be able to do is find some apps that will allow you to take manual exposure and then you can hold the shutter open for a few seconds (if you’re going to be taking fireworks shots).
Lee: Yes, because the Auto one doesn’t work very well, generally.
William: No, it really doesn’t, because it’s going to take a picture ... it thinks you’re taking a still photo. It doesn’t realize that the fireworks are climbing through the sky and you need to leave the exposure open for the whole time. So you’re going to have to have a program that’s going to let you keep the exposure running for a few seconds.
Lee: Yes and not fire the flash!
William: Something else you want to keep in mind is, if you’re going to be someplace where it’s wet – and that could be anywhere in Florida usually during the summer time – but if you’re going to be going off to one of the water parks or going on a wet ride, you’re probably going to want some kind of waterproof protection. And that’s a brilliant idea, not only because it’s going to keep your camera phone safe, but because you get some great shots that you probably wouldn’t want to have another camera out there.
You want something that’s going to be waterproof, so you can take it into those areas and get shots where the fun is and that fun is going to be like Kali River Rapids over at Animal Kingdom.
Lee: Yeah. I took photos on there with my iPhone. I’ve taken some video as well with the iPhone in the pools and in the water parks.
The thing is, when you go out I think we’ll cover that a little bit later, but you really want some way to protect it and we’ll get into some of the little tips and hints and things you can do and benefits of having a good waterproof pouch for it. You don’t need to splurge on a new camera.
William: When we talk about reach, one of the first things people talk about is a selfie stick. But if you’re going to Disney Parks, no selfie sticks allowed.
Lee: That’s just in the parks, right? I think you can use them at the resorts and Downtown Disney, am I right? Just checking as things have changed.
William: Yeah, the parks have signs: No Selfie Sticks. So it’s not just on rides. I think it’s in the parks as well. But there are probably some things that you can do to get around that.
You can have a little mini tripod, you can have a little holder for your phone and there are a couple of things where it’s almost like a steady cam kind of thing and you’re holding a pistol grip and if you’re going to be walking shooting video, it keeps your video steady.
Lee: Yes.
William: There is some stabilization inside the iPhone. I know that some of the Android phones also have that, but it’s never as good as having real, physical optical stabilization.
You’ve got your gear, you know why you want to take the phone. Now let’s go ahead and talk about some of the ways that you can just get better photographs.
We are going to start off with one of the keys, which is better composition.
Most people, if you watch them walking around the parks, they are standing straight up, holding the phone maybe just right up at their eye line and they have their arms out like chicken wings holding the phone in front of them and everybody takes the same photo from the same point of view.
Lee: Yes. And something else to remember, if you are using the front facing camera for a selfie, the picture quality is not as good as it is with the main camera. So it might actually be worth just asking somebody: Would you mind taking a picture of me?
William: Yeah, exactly, because the camera quality on the front is lower than the one on the back. So as much as possible, you really want to take those photos using the rear facing camera.
As far as getting your composition better, there are a couple of things that you need to look at. First off, if you have got gridlines that turn on, do that.
One of the basic things that people teach in photography is something called Rule of Thirds, and that’s where the gridline helps you. Put your subject, the interesting part of whatever you are going to photograph, on one of those lines. It doesn’t matter if it’s one of the vertical lines or one of the horizontal lines. If you can take a photo of somebody and you can put the intersection of one of those gridlines right on their eyeball, that gives you a pretty good chance for taking a really nice photo of somebody.
Lee: I mean, you can crop something, but then you lose some of your resolution. You get the grainy look or the pixels in it and things like that. The other thing is to fill your frame. Have a look and see what you want to get in the photo and before you start to zoom, see if you can get closer. That will also keep your quality higher. There are times you are going to have to use the zoom, but there is nothing you can do about that; it’s the reality of taking photos. But if you can get yourself closer, it will minimize the degradation of the photo quality.
William: That’s why, when we’re taking photos of other people, every once in a while we are out at the park and someone will say, “Will you please take our photo?” We’ll say yes. And then we’ll ask them one other thing.
We’ll say, “Step forward.” They want to have something in the background. For example they may want to have Cinderella’s Castle in the background, they may want to have that ship over at the Little Mermaid on the front ... there are different scenes there and you want to have those in the background. That’s great.
The background fills up a lot of your frame. But if you stand way back as close to that background as you can, you are going to be very small in your photos. So you want people to step forward so you can see their faces. And this kind of coincides with what I was talking about with using the Rule of Thirds.
Have them move over, maybe to be on one edge. You don’t want them dead center in the middle of everything. That’s probably one of the most boring shots you are going to get. Have them stand a third of the way over and have the scene, whether it’s going to be Splash Mountain or Cinderella’s Castle or whatever it may be, behind them. But get them forward so that you can see their faces bright and shiny in the photo and still have the background scene there.
Lee: That’s right. And the other thing to remember is if you are going to plan on sharing these things, just bear in mind that you might need a crop. For example, if you are going to be sharing on Instagram or you are going to be sharing on Facebook or Twitter, you are going to have a different kind of photo format. So it might even be worth taking two photos. Take one in a square crop format and one in the landscape style and then it’s minimal adjustments to make.
Or keep that in mind when you are taking the photo the first time.
William: That’s true, because you always want to think about how you are going to use the photo. It’s nice to get the photo. If you’re going to be shooting and you want to put this on Pinterest, you may want to take a vertical photo so that you’ve got room for it to go vertically; if you are going to take photos for home or something to put on your computer, you are going to want to have them in landscape mode so they are horizontal. If you are going to put them on something with a square crop, maybe that advice that I gave you as far as doing that grid isn’t quite going to line up the way you want it to.
Or you know what? You may want to do something goofy. I’ve got a friend who, every time he goes out and takes a photo of himself, he only does half of his face.
Yep. The other half is cut off! It’s his look. He even does that with other people. So if there are going to be two of them in the photo, it’s like half of this face over here and half of this face over there.
Lee: OK!
William: It’s weird, but it works for him.
The other thing you want to think about with composition, and I mentioned this earlier, everybody is standing full height taking the photo. Don’t do that. Get high. Get low. Take your photos from interesting angles.
You don’t have to be dead center in front of it. You can be off to the side, taking an angle shot, you can be crouching down ... you know what? If you want to lie down on the ground and take the photo of something and just make it look really impressive and super big, do it.
People are doing a lot worse.
Lee: Move around. Yes. And actually getting down low when you’re taking photos often works really well. Get down on your knees - I know it’s not possible for everybody – but if you are able to move and you are in a situation where you can do so, try it. Take a few and see which one you like best.
William: That’s what I was going to say. Take multiple photos of the same thing. You don’t know which one is really going to work out best for you.
I remember one time I was out there with my big DSLR. I had it on a tripod and I had the angle all scouted out for what I wanted and there was this guy walking in front of me with his flip phone and he saw me with my camera and said, “Huh, that must be a good shot.”
So he stopped right dead in front of me, flipped his camera up, pointed it up at my subject, with his thumb took a shot, and kept on walking.
I thought, yeah, that’s going to be just as good. You put a lot of thought into that.
Lee: Actually I had something similar happen, but it was somebody being really sweet. I was at the Epcot Flower and Garden Festival and I had been at one of the food booths on opening day and I wanted to take a photo of the dessert I had in my hand. So I went and found a little spot around on the side of the lake and held my dish up so that I had the lake and the – I think it was – the Tori gate or whatever was there as the background and then took a photo with my phone. There was a couple standing eating the same dessert that I was eating at the table right next to me and the guy said, “Well, damn! I guess your photo is going to be better than mine!”
It was just kind of sweet.
William: You know, sometimes you just gotta do what you gotta do. You’ve got to move to where the angle is to get the best view of your subject.
The other thing you need to do is you really need to pay attention to the light. Where is the direction of the light coming from? What time of day is it? The best shot of your subject may not necessarily be high noon and most likely it’s probably not going to be that. Your softest light is going to be sunrise and sunset. That’s when you’re going to get beautiful sky, you’re going to get nice soft light, you’re going to get some interesting shadows on your subject because the light is coming in from the side.
Lee: And nice colors as well. You actually see the colors, because in the harsh sunlight you kind of get that almost gray, moonlight style washed out look. Everything is kind of faded.
William: And you know, if you’re taking pictures of your family, some of the worst things you can do is take that out in the bright sunshine. We have all seen this. There are photos of kids and they are holding their hand up on their forehead and they are squinting and they can’t open their eyes because the sun is shining right in them.
And you’ve got plenty of light on their face to take a photo, but they look horrible.
Lee: What also helps is if you move yourself into the shade to minimize the glare on the camera lens or you can move the subjects a little bit so they are not squinting in the sun.
But I just want to say something as well. I mean, we mentioned before, this is not a photography critique or anything. Nobody is going to knock your photos. I would rather have a photo that captures the moment with my kid and have it forever, and I’d rather have a bad photo that’s part of my memories of something special than have nothing. So don’t feel like it’s a fail if you take a photo and it doesn’t come out great. Try again, do the best you can. Sometimes the conditions are not going to play nicely.
William: No, and the moment that you want to capture may not happen on a schedule. But if you’re going to be taking photos that you’ve planned, that you know that you want to take, we are hoping to give you some little tips here that will say: Here are the best conditions that you can take them in. Here are some things that you can do to get better results from your photos.
It doesn’t mean you should not take photos because the sun is at noon and they said not to take it then. No. If your kid is doing something cute or if your wife is doing something cute or your husband is licking an ice cream cone, take the shot.
Lee: Yes. Get it. Just ... this is your vacation. Get your memories. Nobody is going to knock them and you don’t have to share everything with everyone. These are yours.
William: Exactly. So there are some you are going to keep, some you are going to look at and say, no I really don’t want to keep that one – delete it – that’s fine. No-one knows until you share it as to what kind of photos you took.
Lee: Yeah, I really didn’t want people to think we are stuck up photographers. We are actually quite nice. Right?
William: Hmmm, I don’t know if I’m nice? I’m stuck up sometimes.
Lee: I’m really sweet. I eat lots of candy.
William: That’s true. She’s sweet. She even has a theme song now, too. We might get to that later if she gets into a rant.
But I agree. You want to capture the moments. That is the most important thing and what we are offering is advice that, some of the things you can probably make a little bit better if you know about them.
A few of you that have got photography experience probably know these tips and if you haven’t thought of this before and you’re wondering why does somebody always get these nice photos and mine never look quite like that? Well, it’s just because these little tips as far as how you do your composition, how you understand the use of light and a few things about post processing that we are going to get into.
And all those things together can really make some brilliant photos and there is no reason why you can’t create those on your iPhone or Android or Windows phone.
Lee: Absolutely. And you can go and show off a little bit. Why not!
William: Absolutely. Alright, so we were talking about direction of light. Of course you know that whether it’s going to be indoors or outdoors, there is always going to be some directional light; whether it’s overhead or off to the side.
You want to kind of use that to your advantage, particularly if you’re taking portraits. And you want to have your subject probably looking toward the light. But that doesn’t mean that you have to have your back to the light or that they have to be blinded. So you can move off to the side and one of the things you’re going to notice when you move off to the side and their face is kind of going in the light is you are going to see an interesting shadow develop on their cheek. That is good. Shadows are your friend. You want to light some things, you want to light the eyes and then you want to let other parts fall into shadow and that actually makes your subject more interesting.
Lee: It does and it also defines the features.
William: Exactly. So if you’ve got someone with sharp cheekbones and you flash a lot of light at them, they kind of lose that because there are no shadows there to define the character of the person.
Lee: Soft light.
William: Soft light is wonderful. But you know what? Hard light works in situations, too. Some things you definitely want hard light. For example, we were talking about the water parks. If you’ve got a nice bright sunny day, it could be nigh noon, but you want that hard light coming from above because when the water is throwing up in the air and you’ve got the little bubbles and all this other sort of stuff, that adds character and dimension to the water.
Lee: It does. It glistens. And hard light works nicely for silhouettes as well. You can make some interesting photos with silhouettes.
William: Absolutely true.
Something to keep in mind about flash on smart phones is flash is very, very weak. I think if you pull somebody into the shadows to keep harsh sunlight off of them, it doesn’t hurt to turn on the flash and light up their face. The last thing you want is to have somebody where you take the photo of them and then you can’t really make out their face later in the photo. So turn on the flash in certain situations.
Lee: But you need to be close enough for the light from the flash to hit them.
William: And it’s only going to be maybe two feet for that.
Lee: For a phone, yes.
William: Remember this later at night. When you are watching Cinderella’s Castle and the fireworks show is going on, you are going to see a ton of people taking photos with their flash. And they are going to have a very well lit photo of the people about six feet in front of them.
Lee: Oh, man!
William: But it’s not going to do a thing for you for taking a photo of the castle or anything else. Those things are lit up already. You don’t need to use flash at night on the castle or for the fireworks.
Lee: And it makes a bit of a white, hazy film over the front of your photo, so everything gets that kind of misty, milky look; washed over, which you don’t want!
William: Exactly. So flash can look harsh, but at least you get the shot that way, but in certain situations, particularly during daytime, if you are going to be in shade and you just need to brighten someone’s face, turn on the flash.
If the sun is behind the person that you’re taking the photo of, the sensor inside of your camera is going to register all of that light and thing it doesn’t need to have a very bright exposure. That is when you want to turn on the flash also, because the person’s face is going to be dark.
Lee: Yes.
William: So take a good look at the photo before you walk away. If it doesn’t seem lit up properly, turn on the flash and take the shot again.
Lee: Yeah, it doesn’t hurt to try twice. Delete the stuff you don’t want.
William: We talked a little bit about the technical stuff on the camera, but from composition there is also storytelling and when you go to Walt Disney World and any of the parks, there are the big things like Cinderella’s Castle or the Tree of Life, but there are also small little details. Don’t forget to shoot the story of what is happening while you are there.
There is going to be the food that you eat, there is going to be some of the merchandise, there are going to be little decorative things along the street or inside some of the buildings.
Lee, you really love going for the details. What are some of the things you look for?
Lee: I do. I mean, I try and look at things ... I just remember you had a little eBook that suggested “Think like a coffee table book” and it was based on some hints and tips for Disney photography, but that was some years ago when I bought that. I didn’t buy it! You gave it for free! But when I went through that and I used it, I started looking at things differently.
I’ve always liked my detail shots, but for example, if I’ve got a nice plate of fruit and cheese and I’ve got my shiny fork that comes with it, I have a look at the things and maybe the strawberries are a bright red. I’ll actually cut into a strawberry and I’ll zoom in and get really close, but I like to get in really tight on the detail.
As I said before, before you zoom, see how close you can move before you lose focus. So there’s that; little textures, there’s merchandise. There is so much interesting merchandise. They have these little displays in the store windows. There are little signs and details. You just challenge yourself to look around the parks. I mean Disney just seems to take forever to stop finding new things.
William: And one of the little tips for the store windows is they are going to have a little glass front to it and if you’re standing back from it trying to get the whole thing in, you’re going to get glare and you’re going to see your reflection in the window. Put your lens up against the glass.
Lee: Yes.
William: You may not necessarily get everything in there, but there is another trick you can use. You can put your phone in panorama photo mode, put it up against the glass and then just kind of walk it along the scene and get the whole thing as a panorama.
Lee: You can do that.
And don’t use a flash, because you are going to get the flare-back, so that is not the time to use the flash.
Also, if you wait until later in the day when you don’t get such harsh shadows you are going to get the lights, but if you do it just before it gets totally dark, your reflections are kind of at their lowest at that time.
Does that make sense?
William: It does. The detail shots, like I said, are part of the overall story. And the advice that I got and I’ve given to others since I got it is to think like a coffee table book. In other words, look at the whole story. There are going to be the big things. If you are going to be going to Walt Disney World, the big thing that you are going to see there is going to be Cinderella’s Castle. It’s going to be Main Street USA; it’s going to be Space Mountain. Those are the huge things.
But you want to go from large to small, or from small to large. So when you walk into Walt Disney World, don’t just look down Main Street. Look down. You might see that there are interesting markings in the asphalt. You might find some of the windows that are interesting because they’ll put the names of key Cast Members along those windows. You are going to find details, little hidden Mickeys throughout the park. Some of those things are nice little memories of things that you can find and discover.
Then there are also actors and craftsmen that are working along Main Street.
Lee: Yes.
William: So as you are walking down Main Street, you look off to your right and you are going to find there is a little glass shop there and there are people actually back in there that are blowing glass and they will pose for you; they will make sure that you get a nice shot.
Lee: They will. And the same with people working in the restaurants. I think of Main Street Bakery as well. They have people behind the counters. Most of them are quite happy if you ask if you can take their photo. I usually ask first. I tend not to just take the shot, but I don’t think they expect you to ask, so don’t feel bad if you don’t.
They will pose nicely for you if you do ask, which is an added plus.
William: And if you want to take a photo of something that is a food item someplace and you just can’t quite get to it, ask nicely. They will usually probably accommodate you.
Food is an important part of your visit. So you might want to start off with – if you’re in the parking lot you might want to take pictures of the tram. If you’re coming up on a bus, get pictures of the bus that was taking you back and forth from your resort. Get pictures of your resort if you are staying onsite. Everything that you encounter is part of your story.
Take pictures of all of it. There are plenty of places where you can use those photos later on and if you are thinking of making a coffee table book with them, you are not going to get very far if you’ve only got like five major pictures and then no detail to go with it.
Lee: That’s true. I mean, get pictures as you are walking into the parks as well, especially if you’re there for park opening. You know, you get the crowds in front and when you turn around, if you go there really early and you are waiting for a long time, if you turn around and look behind you, you know that feeling you get when you think, “Thank goodness I arrived so early, because look how many people are back there!” because loo
William: Yeah.
Lee: Snap a photo of it. That’s all kind of – you can illustrate your point when you go and tell other people and you’re trying to explain something, it’s very difficult to explain things sometimes without a visual.
William: Yes, and if you’re early in Magic Kingdom in the morning they will have a horse and trolley out there. Take some pictures of the horse. Take some pictures of the detail of the leather on the horse, because that’s going to be gone rather quickly. That horse has got the best job at Walt Disney World.
Lee: Yeah?
William: I mean it works for like an hour or two and then it’s got the rest of the day off.
Lee: And if it’s Independence Day or New Year’s Eve or something and you are standing outside Space Mountain, take a photo of the wait time because you’ve got to see it to believe it.
William: Exactly. So the wait time; I didn’t even think of that myself, but all those are part of your story. Like, did I wait a long time or did I get single rider FastPass to go through on something.
Lee: And the queuing areas! There are so many details in the queuing areas. I mean, I think of a few like Tower or Terror, Space Mountain is kind of tricky to do photos with an iPhone, but they actually don’t come out terribly while you are waiting for that, if you end up in the regular standby line, Splash Mountain...
William: Haunted Mansion.
Lee: Haunted Mansion, yeah.
William: Haunted Mansion has a ton of things and if you really want to enjoy the queue and wait a while longer, they’ve kind of got two lines. You can go straight to get in or you can go through and enjoy all of those little things and scenes that they have set up for you.
But we are just saying, think like a coffee table book; think from large to small and from small to large. Cover every little aspect of your vacation. That’s really going to kind of help you.
One, it’s going to make you a better photographer if you’re taking more photos and two, when you get home it’s going to give you a better memory of your overall vacation.
So it’s not just the things that we are talking about in the park. It’s not just the technical stuff. Make sure you also take pictures of your group, yourself, the folks that you are with and enjoying the park.
Lee: Yes. Absolutely. And maybe even Cast Members and people who help you out. Get pictures. They love to pose with you. I’ve never had somebody tell me no.
William: No, I don’t think they will and something comes to mind. Like you stayed at French Quarter a number of times and there is that greeter over there. What’s his name?
Lee: Oh, Arniel?
William: What does he do? He’s dressed up.
Lee: He’s the magic maker!
William: Magic maker.
Lee: Yes.
William: But he’s there every time and he remembers you when you come back.
Lee: He does!
William: Do you have photos of him?
Lee: I do, yes.
William: And that’s part of the story that you were experiencing when you guys were staying there.
Lee: He gives such a grand pose for anyone when you take a photo of him.
William: Yes, so don’t be afraid to ask. I mean the worst thing that can happen is maybe they can’t or they will say no.
Lee: Well I mean obviously, if you see they are really busy you might want to come back, but they are not going to say no just because they are not in the mood.
William: Exactly. They know that this is part of your vacation. This is why they are there. They are there to help you have a wonderful time. That’s why they are called Cast Members. They are part of a show, no matter what they are doing.
Lee: Yes.
William: We’ve got a couple of other tips over here for you. Smart phones are great, they are wonderful, they are portable, but they are also going to have some limitations and those limitations are probably going to show up the most when you are in a dark area.
Lee: Yeah, I think anything with a basic camera sensor is going to give you a challenge in low light, so dark rides and things like that ... you are probably not going to get the best photos. You can try. You can have a look at it, but you are going to have a challenge with it.
William: Well, I’ve got my D800. It’s got a large sensor inside and it’s so wonderful in low light that it can see in the dark. But it struggles trying to take photos going through Pirates of the Caribbean.
Lee: I’ve never really had any great photos out of there.
William: I mean you work hard with a DSLR on that moving boat in the dark area trying to get some photos.
Lee: Even with a really expensive, super fast low light lens, it just wasn’t going to get it.
William: Exactly. So don’t beat yourself up or wish that you’d done something else if you are working with your smart phone.
Lee: It’s not you. The camera has limitations.
William: And those are the times when maybe, you know what? It’s time to put the camera aside and just say it’s not going to work here properly. Relax; enjoy yourself.
If you’re in an area where you can put up a little tripod and stabilize it and maybe have an app that will let the shutter stay open for a while it might be worth a shot. But if you are on a moving ride like Haunted Mansion or Pirates of the Caribbean, I don’t think you are really going to get much.
Lee: No, that’s probably the only time you might pray for a breakdown.
William: Once you’ve taken your photos, you need to process them. The photos that you get inside of your camera app on your phone are basic. It documented something. But you want to be able to punch it up a little bit and we’ll talk about a couple of the apps that will do things and we will talk about some of the techniques that you can use to make that a little bit better.
Lee: Yeah, that’s right. I just want to say one of the other limitations using a smart phone over and above a bigger, more expensive and capable camera is you’ve got quite a wide lens that comes as the default. So sometimes your portraits, especially if you get too close, are going to distort the face. Bear that in mind when you are taking pictures of people.
William: That’s a good point with wide angle lenses anyways. And there are a couple of things you can do. One is if you are going to take photos of somebody with a wide angle lens, try to keep them on a horizontal plane.
So in other words, what I’m saying is if someone is reaching toward you and their arm is out or their hand is out reaching towards the camera, their hand is going to look enormous and their head is going to look tiny. But if they keep their arms by their side or they are just kind of maybe holding their shoulder or they’ve got their arms wrapped around their body they are kind of on the same plane. That’s going to look much more normal than if there is some kind of change in your subject with the distance between the camera and where they are standing.
Lee: That’s right.
William: The other thing you can do is there are third party lenses you can find. One that comes to mind is called Olloclip and they kind of clip right over your iPhone. I’m not sure if they’ve got them (they probably do) that will work with Android phones as well, but basically these are lenses that you can slip on over there and they will kind of magnify or give you a bit of a telephoto or maybe even more of a fisheye look, depending on what you are going for.
But take a look at Olloclip. As a matter of fact, we will put a link to them in the show notes and give you an idea of what kind of add-on lenses you can use with a smart phone.
Lee: Yes, you can have a lot of fun with these. Do you remember what they cost now?
William: I’ll have to take a look and put it in the notes.
You know, if you’ve got some of those street performers and you get a fisheye and just put it right up in their face and take the shot; you know, don’t annoy them obviously, but if they are going to pose for you and you say I need to get this right up there and they say OK, go for it ....
Lee: Especially Hollywood Studios. You know those kinds of people?
William: You never know. You may just get a Dapper Dan just really stick his nose there at you.
Lee: Oh, I’ve had one of those as well. I didn’t have a fisheye though. Now that you mention it, that would have been fun! He came right up there.
William: OK, we talked about a couple of apps. There are so many we cannot possibly go over all of them, so we picked just a few that we’ve tried. Some of them we’ve heard of that other people had good success with, so we want to share this with you and of course, we’ll put links to these in the show notes in case you want to try them out for yourself.
But let’s start with probably one of the most popular ones and that’s Instagram.
Lee: Yeah. It’s built into Instagram. In fact, I never really thought about using it as an app for editing my photos because that’s not the primary one that I use. But when I saw it and started playing around with it, it doesn’t do a bad job. It has got a lot of filters. I know that filters are really popular and people like to put their little color cast or their wash over it. It is not my thing, but we have a fourteen year old and she loves them. So we are obviously just not cool enough. So it’s not to say don’t use them. If that is your thing, you can have some fun right there in Instagram and then post them as you are ready to do so.
Also, you can make collages in Instagram. You’ve got basic layout options. You need to install the little program called ‘Layout’ and it prompts you to do that. It will ask you if you want to make a collage and if you just click on the little icon it will get you to install Layout. There is no charge. It’s free.
You get some various options. You can have some horizontal options, some vertical options, square ones and mixed things in there. It is pretty basic but you can have some fun with it.
As far as editing the photos themselves, it gives you the basic adjustments so you can increase your exposure (that’s how bright or how dark your photo is), you can play with the shadows and highlights a little bit, you can increase the saturation if you need brighter colors or if you need to reduce the color if you are looking for something a little bit more faded and it’s also got a tilt shift option as well, which is kind of fun if you want to play with something like that.
Something that is nice in the Instagram app for editing is that it gives you a leveling option. Even with my big camera, I just have a terrible lean. I always lean to one particular side when I take a photo, so all my things need to be straightened and this allows you to do it on a vertical and on a horizontal plane. So you can adjust your photo if you weren’t quite straight with the horizon. So that’s a nice option to have.
The other little thing that I saw on the Instagram app for editing that didn’t seem to be on any of the others – not that I’ve noticed or that I’ve used – is once you’ve edited something, for example you’ll edit under the color heading, you go back and you get all your options and have a look at it; there will be a little dot that appears underneath color. So when you have a look at your options for editing, you can see what you have adjusted and what you haven’t, so if you need to go back in and tweak something again you can do so. And if you’ve missed something you can see straight away that you haven’t touched it yet.
William: One of the things that I found when I’m taking photos with my iPhone is, for the most part, I’m not using these apps to take the photo. I’m just using them to process it afterwards.
Lee: That’s true, but you can take a photo with your camera and upload it straight to Instagram. You can also upload videos onto there.
William: That’s useful. The reason that I don’t take the photo inside of most of these apps is because I want the regular photo to go inside of my photos folder and then I can use it in multiple apps later on if I need to.
Lee: Well, I’m the same. And also I’ve eventually settled a year or two back on a favorite photo editing app; something that works for me. And what works for me is not necessarily going to work for the next person, so you need to play around and find what works for you and stick with that, or a combination of a few things if you need to do so.
William: OK. Alright, so let me go over this. I’ve got a number of apps on my phone and honestly, I always reach for the same one and the one that I like is Camera+
Now it’s got two sides to it. Obviously there is the part where you can shoot and it’s got a little bit more control than what you would have just using the built in camera app. If you want to take a macro shot there is a section for that. You’ve got three basic crops so you can do a square, you can do the normal crop of what the phone is and then another one that’s kind of a bit more of a 16:9 kind of crop.
It does have a little bit of a built in stabilizer. It’s not going to handle tremendous shake, but just for your little hand shake, it’s actually done a fairly good job with that.
Lee: It helps. Yeah.
William: You know, you can take a normal shot. You’ve got a timer on there if you just want to set the phone some place and then get in front of the camera and take your photo, so if you need a phone with a timer, the camera here has that.
And of course there is also a burst mode. So if you’re taking action shots and you don’t know which one is going to be the ... sometimes with a smart phone it’s kind of hard to hit the time of a shot just right, so you may want to do that first for a spray and pray and hope that you get the photo.
Lee: Yes. It usually works.
William: It usually does, but I don’t use that very much. What I like about Camera+ is doing the editing. So I’ll switch it out of the camera mode and move it over to the post processing mode and then I’ll just hit the plus sign and import a photo and it could be the latest photo that I’ve taken, or I can just go and select the photo from any one of my folders and once I’ve done that it’s just got a number of choices.
So for example, you hit the import button and it brings it in here and then you’ve got immediate options to edit, share or save it off as a new photo when you process it.
Nine times out of ten I’m going to do something very simple. I’m going to hit the clarity button and then I’m going to go over to frames and put on just a vignette and nine times out of ten, that actually works nicely.
Lee: Are you going to explain what a vignette is, for those people who aren’t crazy into the photography stuff?
William: A vignette is where you kind of darken the edges a little bit. You don’t want to do it too much and this one actually does it a little bit more than I want to. The reason is your eye is drawn to the place that is brightest and then to the place that is sharpest. So if you put a vignette around it, it means the bright part is inside of the frame. The sharpest part is going to be inside of the frame. So in other words, you’re kind of sub-consciously helping people look deep inside of your photo, rather than just going right across it and saying, “That’s nice.”
You put the vignette on there and it holds their attention a little bit longer. They kind of see what you’re up to and what you’re doing there. Once you’ve gone inside there are a number of options as far as how you want to process it. You can change the white balance, they’ve got presets on here if you want to do it for food or portraits or something that’s backlit, because it will kind of brighten the face of somebody if you didn’t put some light on it.
There are a number of different crops. They’ve got filters on here. We were talking about Instagram and all the filters they have. There are plenty of filters on here which I find absolutely atrocious. I really do! And they’ve also got a little add-on pack. So if you want to spend 99c on – a Hollywood pack is one of them – you can get more filters. If that’s your thing, that’s great. They’ve got plenty built in and you can also buy more. They’ve got a little store that’s built into the app. That’s really why I love this thing, because I can add clarity and if you are not familiar with the concept of clarity, what it’s doing is it’s adding a bit of sharp to your photo.
Lee: Contrast as well.
William: Yes, it’s adding contrast. And most of my post processing that’s what I’m going to do; I’m going to bump up the contrast a bit; not a whole lot.
Lee and I both know that if you move a slider all the way to one side or the other, you’ve got a bad photo to begin with.
Lee: Yeah.
William: It’s kind of like being a pilot. Small moves. You want to do the same thing with your post processing. You want to add a little bit of contrast, you might want to add a little bit of clarity that kind of brings out the detail. Let’s say you’re taking a photo of something with texture, or a person that maybe has some wrinkles and you just want to enhance those a little bit, but not make them look garish, you just add a little bit of clarity to that and a little bit of sharpening and maybe some vibrance.
Vibrance is different to saturation. Vibrance kind of protects skin tone, but it enhances other colors, so it will make the green a little bit greener, but if you’re taking a photo of yourself it’s not going to make you look orange.
Lee: It almost gives a bit of a glow, a soft glow, to the existing colors as they’ve been captured, rather than increasing the intensity and making them look crazy.
William: Like I said, I’ve got a number of apps on there, but I kind of go for Camera+
Most of the time I’ll take my photos with the built in app. iPhone lets you do a little bit of editing inside that app, but I don’t find it to do quite what I want. I can do it better inside of Camera+.
Lee: I’m the same. And I’m happy with the default iPhone for basic adjustments with the editing that’s inbuilt, but as I say, I’ve got my go-to, which is a little bit different to Camera+. I also have Camera+ and I like the macro shots option that’s in the camera there and that works really well.
William: Is this mostly for the food photos or for something else?
Lee: Really just anything. The other night I did that post with the wine bottle cork.
William: Oh that’s right!
Lee: I got a bottle of wine and when I peeled the foil on the top of the cork it said “Cheers!” I just thought it was really cute. Silly little things like that make me smile, so I took a photo of it.
I think what you want to remember with this when William said use the sliders carefully, less is more. Think about it like make up for your photos. You really want to enhance what you’ve already captured. You don’t want to manipulate stuff unless you are going for a kind of weird look. It’s probably not what you are going to do with your memories.
My favorite photo editing app is just called Photo Editor. Now I’ve got this on iPhone. I think it’s available for Android and I think it’s under the same name. I’d have to double check that. It offers possibly a little bit less on the free version, which is all that I have, by the way. You’ve got the paid version of Camera+?
William: Oh yeah.
Lee: You see mine is just free so I could get more with it, but I am more than happy. I think one of the things that I like is vignettes and William was explaining about using the vignettes to draw your eye to the center of the photo. Now on Camera+ it will put that vignette there so that your brightest spot is in the central area of the photo. I have a tendency to never put my subject in the middle of the photo, which means that I don’t want my vignette there and I think that’s one of the reasons why I like the photo editor because you can actually move the vignette where you want it to go.
I just saw him playing with frosty white edges! It’s a little inside thing that we don’t like frosty white edges. I’m going to tell everybody. Your reputation is going down the toilet.
William: No, I’m playing with the vignette on Camera+ and there are two places where you can get a vignette and I got busted here because she saw me doing this.
OK, so on the bottom row they’ve got a section for frames. If you choose the vignette from there it just slaps on a vignette that you can’t modify. There’s nothing you can do.
But in the middle of the bottom row there’s a thing called The Lab and that’s where you get a lot of options to modify what your photo is. I mean you can change the tint, you can make it duo tone, you can do soft focus, you can add film grain, you can sharpen it, blur it, all those fun little things you can do. You can change the exposure, but they also have a vignette there at the very end. And this vignette comes with two sliders. You drag it to the left and you get a dark vignette. You drag it to the right and you get a white vignette. White frosty vignettes are just horrible!
Lee: There was a time when they were popular in wedding photos. It was seen as a romantic look.
William. Well, it defeats the whole purpose of a vignette. If you brighten the edges you are going to have someone’s eye just go straight off the frame. So I don’t know why that is there unless your photo is so bad that you want to show it, but yet you don’t want people to actually look at it and use the white vignette.
Lee: It might have been there from the beginning when they launched the app. I mean there was a bit of a trend for it. You either love it or hate it. It didn’t bite me.
William: And the other slider I was talking about is the size of the vignette. So in other words you can drag it all the way to the right and it really narrows the vignette down to just the center of your frame, whereas you bring it over to the other side and it only kind of darkens the edges and basically you can change it anywhere in between. So you don’t really need that strong of a vignette for most of the things. You just want a very subtle, almost ... you don’t want someone to notice your vignette.
Lee: Again, less is more. I think with any of these things you are going to find that less is more. Just enhance what you’ve got. Don’t be so hard on yourself. You’ve probably taken a good photo and everybody’s photos now and again need a bit of tweaking. I mean most of the time we want to adjust at least something.
William: Well, every photo needs sharpening. Every photo, I think, ought to have a little bit of a vignette and some contrast.
Lee: Yes, but you’re going to find your own style. You’re going to find what best reflects how you see things and what you like right now.
The other thing about Photo Editor and – does Camera+ have the ability to put in frames and text and stickers?
William: Oh I don’t know about stickers. You can do different frames, but there is a different class of apps. If you want to make some of those, social media editing apps ...
Lee: Yeah, you can do that. But I know that on Photo Editor you can add text. I don’t really use it very often because I’ve got different apps that I prefer for that for versatility, but if you want to do something for a quick social media share or upload, you can have some fun with that on there as well.
William: Yeah, Camera+ I don’t think has anything on here for text. I’m looking through it and I don’t see anything like that. They’ve got some presets and then you go to The Lab and you can do some things, but those are all about the image. Oh actually, I take it back. Here’s one for text.
Lee: Well, damn. I was hoping that my app was better than yours.
William: No. Camera+ is best. There you go.
Just because I hit it doesn’t mean I made it work, though.
Lee: It’s a blank screen!
William: So text may be just a block. I haven’t played with that part of it.
Lee: OK, you’ve got Snapseed.
William: I do.
Lee: You told me about Snapseed. I installed Snapseed. You said it was pretty good. I can see how some people might find it pretty good. That app is gone from my phone. I was unimpressed and very underwhelmed by it.
William: Oh, hold on, I get too use Lee’s theme now.
This is our theme. Lee’s got a theme. She’s got an opinion and you’re entitled to it.
Lee: I always have opinions. I like to share them.
William: Let it roll!
Lee: Snapseed? OK, that was just a waste of download space. I just freed up the space for something more useful on my phone. It just gets these great reviews and I’ve heard about Snapseed; I know you’ve got Snapseed, so I figured it must be good if you’ve got it.
William: No, I got it because everybody else told me how great it was.
Lee: Well, you asked me, “Have you tried Snapseed?”
I said, “No.” And the way you said, “Well you should!”
I thought, well I’d better try it.
William: I said you should because I thought you should at least make an opinion of it. I didn’t necessarily say you should use it. I said you should at least try it and see if you like it.
Lee: Man, that was just a waste of like fifteen minutes of my life I’ll never get back. I had to wait for the thing to download. OK, that didn’t take too long. But I spent some time working around it and went and looked at a video tutorial and thought I must be missing something. It really is pretty basic. It doesn’t offer anything special. And I think the thing that I didn’t like about this is that it’s got this sliding version on the screen to control things and I just found it fiddly.
It was just a pain. I kept hitting the wrong thing and I usually don’t have problems with this. I’ve got a touch screen phone, I use and iPhone so I don’t have problems working on the screen, but this was just ... it didn’t work for me and I didn’t think that it offered anything special. In fact, it seemed to have a little bit less than some of the other apps had.
So either I’m missing something or it’s just not for me, but Snapseed is an option. It’s worth looking at. It might work for you, but for me? Waste of time. Waste of space.
William: And there’s Lee’s opinion.
Lee: Yeah. Hmm.
William: Honestly, I’d look at it. And Snapseed is kind of a preset thing where you’ve got some options that you don’t find in some of the other apps and it depends upon your preference and style.
So for example, I open up filters and they’ve got a lens blur, they have a glamor glow which is kind of like a softening effect. You’ve seen this in different beauty and portrait shots before. They’ve got features on here like grunge, which you just tap that and there are a couple of settings that you can just slide your thumb back and forth and go through various settings. As a matter of fact if you just drag your thumb over it you’ll see it go through some of the changes.
Grunge is really just a texture and desaturated color and it’s nothing I’m ever going to use. But tonal contrast is kind of like clarity and you can really bring out some details with that. It depends again on your taste. Is it a great app? Some people really love this. I have not found myself really needing to use it.
Lee: You’ve got this left and right swipe and then you’ve got the up and down swipe and you’re kind of using your finger to dial around the screen. I guess until you get a feel for what motion does what, you are working blind.
William: Well here’s the way I look at it. There are people who get a camera app and what they want to do is play with all the options. They don’t necessarily go out there to try and make a good photo. They want to play with all the options. This is one of the apps that you get if you want to play with a bunch of different options. And then you select one. And it may be a hideous photo, but it’s yours because you took it and you put all these combinations of filters on it.
Lee: Some people find places to share what would be hideous photos, but they might be having some fun with something. I mean, if it’s your thing, go for it. Maybe I’m just too old to appreciate this. I just felt that with Snapseed it wasn’t offering a lot of the options that other apps offer and quite honestly you can go to plenty of other free apps and get even more. If it’s filters and things that you are wanting, there are other free apps that offer more.
There is one called Fotor. I don’t know if I’m pronouncing it correctly. I was going through some tutorials on it. They boast 100+ effects on there. Now when I started to scroll through there I guess it’s great in terms of the options it sounds wonderful. You’ve got 100+ things. But where do you start? If you don’t know what you’re looking for and you don’t know how they’ve named these things, it can be a little bit overwhelming. But if that is what you are wanting, it’s probably worth a look. It’s got a quick enhance tool and it’s got an intensity slider and that is really nice. When you do an auto correct or an auto fix or something, you can play around with the intensity of it. Sometimes it gives a little bit too much or a little bit too little and having that option is useful.
William: One of the things I thought you liked, though, was it can make collages.
Lee: I like collages. What on the Fotor app?
William: Yes.
Lee: That’s what got my attention because a lot of people like to make collages. I like to make collages, Tové likes to make collages. It’s just a fun way to share a bunch of photos if you want to do one post, especially on social media. Maybe you want to print a postcard or something.
William: I guess I look at Snapseed and Fotor and some of these ones that have a lot of effects and presets in them as overcooked photography.
Lee: It can be.
Now I know that there’s a bit of a trend for some of these looks. You know, you’ve got these color wash things. It’s not for me. It’s popular. There are people who really like it and if you are not really wanting to waste time doing things and this is the kind of look that you are going for, a lot of these things give you a one or two click quick fix. If you want to play around and have fun with them, I’m not saying don’t use them. Actually I would encourage you to go out and try a few of these and see what works for you. See if you can find some stuff that you like.
William: I’d say if you have a background in graphic design and you understand how colors work together and how they work with a photograph and you want to change them and have a bunch of options to make them work that way, then these tools are fine. If you don’t have that background, then I think you’re just going to be playing over there and think, “Oh that looks pretty ... oh that’s ugly!” And that’s going to be the extent of your experience.
One of the popular ones that’s out now is called VSCO. I’ve seen some really beautiful photos taken on an iPhone and then processed with VSCO and you can get some really nice detailed looks from the presets and then of course, there are others that my favorite word for these things is “hideous.”
Lee: Yes.
But the thing with VSCO is that it’s got some really advanced camera settings as well. You’ve got your manual camera options if you want to use that. And it also has a social media platform. You can go in and share your photos. You’ve got some privacy control if you want to do that, but you can set up a profile on VSCO. It’s almost like Instagram, I would say, where you can share things and interact with other people and get little comments and interaction on the things you post, if you want to do that.
So that offers you different options.
William: Well it’s got a bit of a community to go with it.
Lee: It does.
William: Like, look what I created.
Lee: I’d say try a few of these. Try all of them. See if you see something different that we haven’t covered, because there are many. We just took a few that came up repeatedly as popular options. Try them out and you are probably going to want more than one.
William: You are at first. I think you are going to see which ones you end up going to the most. For example, I said Camera+ is the one that I just keep going back to over and over again. Some of the others I’ve got on there are for special purposes and that’s what we want to talk about.
What if you want to do fireworks? Well, as I mentioned, for fireworks, you want to be able to control the shutter speed beyond the one second mark. Some of those bursts you’re going to have the shutter open for a few seconds while they go up.
Lee: Yes, so that means you want some stability as well so it doesn’t get all blurry. Otherwise you get these like squiggly things.
William: And you’re going to need to find an app for your phone that will allow you to control the shutter speed, you’re going to need to find a little tripod that you can get some stability.
I’ll tell you one thing, if you’re planning on shooting fireworks and you think you’re going to set your phone on the garbage can at Walt Disney World, don’t. Because one, even though you’re standing there, other people are going to come up and put their garbage in the can and shake it.
Lee: Yeah, it’s not a good place.
William: And two, someone is going to stand right in front of that garbage can.
Lee: Oh you are guaranteed! Well, there’s nothing you can do. I mean there is nowhere else to stand. There are so many garbage cans down there and especially in Main Street!
But you can use a rail. You do actually get a Gorillapod and similar items for iPhone.
William: I think one of the best things to do is probably get a little bit off center so everybody lines up almost straight down Main Street to watch things right over the castle. But you know what? You get off to the side and you can have a lot of room to yourself and then still have a unique view off the castle with the fireworks going on, that most people aren’t going to have to take photos.
Lee: Yes, see what you can do.
William: Dark rides. We kind of mentioned that a little bit. Good luck!
I wish I could be more positive about that.
Lee: Yes, I’ve had more misses than hits, even with a really expensive camera and good lenses on dark rides. It’s not just that. You actually have to practice and do a bit of homework and get to understand how to do these things. So if it’s not working with your iPhone, it’s not you. The camera is just not cut out to do this.
William: And then we also talked about wet rides, rainy days, water parks. Get something to protect your phone from the environment. But you can take some fantastic shots in the water parks or on the wet ride.
Lee: Yeah, I mean I often read on forums and I see people commenting on things posted on websites and they are asking about a good waterproof camera and they are on a strict budget. The only time I ever used a waterproof camera was at Disney World. I don’t, otherwise, tend to go out in the rain. Now I say the only time I used a waterproof camera; it’s the only time that I wanted one. I never ended up investing in one.
What I did do was (because I’m cheap!) I bought an iPhone camera pouch on Amazon of all places. I don’t remember what I paid for it. It was definitely well under $10 with free shipping and it had a neck strap, which I replaced with my own lanyard because it was more comfortable. It had a triple Ziploc bag type clip and seal – like a triple seal thing. It was clear on both sides so you can see the front screen of the camera and the lens was open as well.
As long as you make sure that it’s clean and you try keep it dry on the outside (what I’m saying is free of smudges for glare and murky things), I didn’t have to get a locker or anything. I had my phone with me at all times and I took pictures on the Kali River Rapids, in Typhoon Lagoon in the wave pool ....
William: Those are great places to take it. Not only that, but if you’re going to Walt Disney World, particularly in the summer, expect a rain storm at some point. But you know what? Some of the best photos I’ve taken out at Walt Disney World were either during or just after a rainstorm. You get that nice little sheen on the sidewalk or the roads out there and particularly if it’s around sunset time when some of the lights are coming on. You just get a glow out of these lights, that is wonderful.
So don’t be afraid of shooting in the rain or in the wet conditions, but just be prepared for it.
Lee: Yes, soft light. So pretty.
William: Exactly.
Alright, we hope this has helped you out a little bit, but most of all, have fun on your vacation. If you can get the shot, don’t worry about all the things that we’ve talked about it. Get the shot. Because, most importantly, you want to have your memories. The things that we are talking about here, keep them in mind and apply them where they suit you best.
Thank you very much for joining us on the Orlando Local Show. This is episode 3, which if you want to find show notes, go to orlandolocal.com/3
We are going to have a transcript out there of this show. If you want to remember what we said, don’t worry. It’s in writing. All you’ve got to do is go there, click on the link to get the free transcript and we will send it to you by email.
We are also going to have some links out there for some of the items we talked about, so you’ve got a link to go find some of the apps that we were looking at and the Olloclip stuff. Finally, we want to tell you once again, thank you very much. We really appreciate you being here and we hope to see you again next week.